12 Vanilla Blonde Hair Ideas for Men with Straight Hair
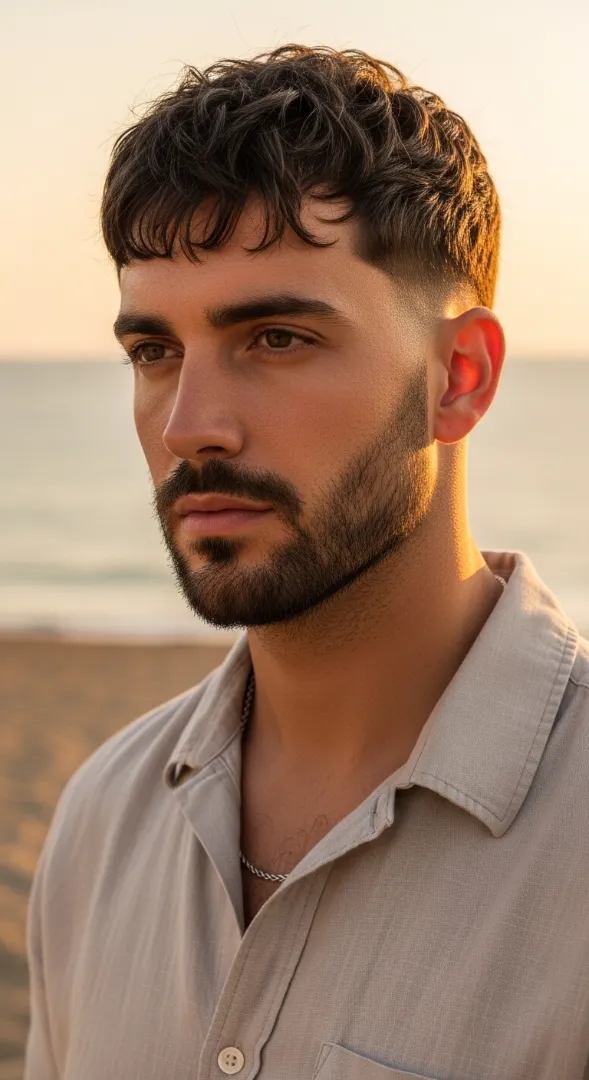
1 of 12 — The Golden Hour Crop
The Golden Hour Crop: Complete Style Guide
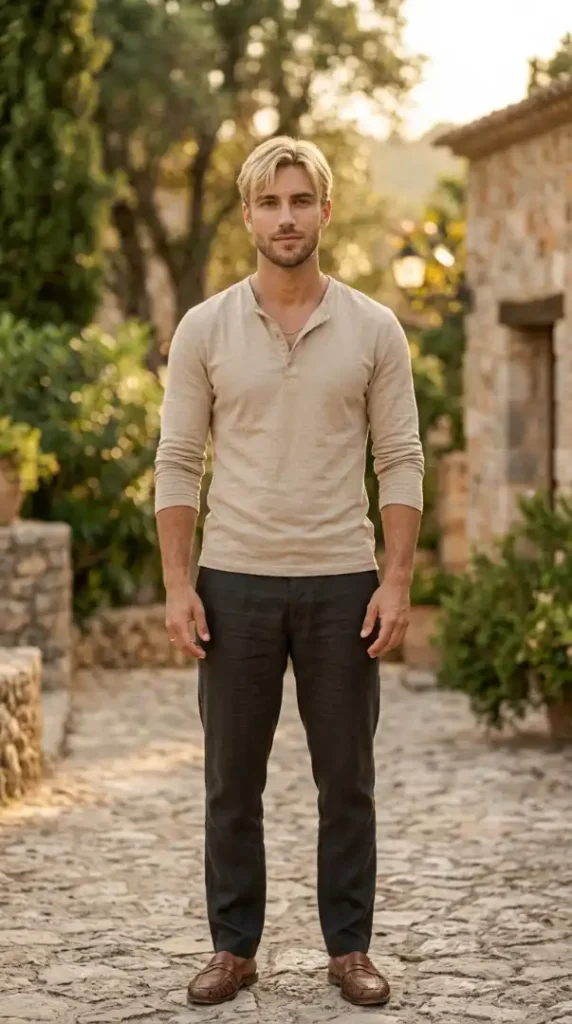
The Golden Hour Crop takes vanilla blonde straight hair and shapes it into a soft, textured crop that catches light the way honey catches sun. This cut works because straight hair holds a crop shape with minimal effort — no cowlicks fighting the fringe, no curl pattern disrupting the line. The vanilla blonde tone reads warm rather than cool, which is exactly why this shade works so well on Mediterranean and olive skin tones that would otherwise clash with ashier blondes. The Golden Hour Crop sits at the intersection of low effort and high visual payoff, which is precisely why it keeps trending on Pinterest boards tagged under men’s blonde hairstyles.
Which Face Shapes Suit The Golden Hour Crop Best
Oval and square face shapes get the most out of The Golden Hour Crop because the soft fringe adds width at the forehead without exaggerating length. On an Oval face, the textured crop maintains the face’s natural balance rather than fighting it, while on a Square face, the rounded, feathered fringe softens strong jaw angles instead of competing with them. Round faces should approach this style with caution — the horizontal fringe line can add width exactly where a Round face doesn’t need it, making the face appear shorter and broader than it already reads. Diamond faces do well with The Golden Hour Crop as long as the fringe is kept slightly longer to balance a narrower forehead against wider cheekbones. Oblong faces should ask for a slightly heavier fringe to interrupt the vertical length of the face, preventing the crop from making an already-long face look longer.
Grooming Kit for The Golden Hour Crop
Clippers: Wahl Magic Clip (Model 5049-400) for tight cleanup around the ears and neckline. Trimmer/Outliner: Andis T-Outliner (Model 04710) for crisp edge work along the hairline and sideburns. Finishing Tools: Kent 81T fine-tooth comb for parting precision, Denman D3 boar bristle brush for smoothing the crop into place without disrupting texture. Styling Product: American Crew Fiber (matte finish, high hold) — dime-sized amount worked through damp hair for texture without shine, or Layrite Original Pomade (medium hold) for a slightly more polished finish. Maintenance: Honest Amish Beard Oil, a few drops worked into stubble daily to keep the beard-to-hair transition looking intentional rather than patchy.
How Often You Need To Maintain The Golden Hour Crop
Maintenance level: LOW to MEDIUM. Barber visits should happen every 4-5 weeks to keep the crop’s shape from growing into a shapeless mop, since straight hair grows out fast at the crown. Daily styling time is 3-5 minutes — towel-dry, work a dime-sized amount of fiber through the roots with fingers, then use the boar bristle brush to direct the fringe forward and slightly to the side. The product routine is a single step, which is exactly why this cut appeals to guys who don’t want a five-step morning routine. As it grows out, the crop starts to lose its crisp fringe line around week 5 and drifts into a soft, slightly shaggy look — still wearable, just less sharp. Monthly maintenance cost, including a cut and one pomade purchase, runs approximately $45-65 depending on your barber’s rates. Difficulty rating for home upkeep between cuts: Beginner.
What To Say To Your Barber For The Golden Hour Crop
Say this to your barber: “I want The Golden Hour Crop — keep the top at 2 to 2.5 inches with heavy texturizing throughout, no blunt weight left in. Point cut the fringe so it falls naturally instead of sitting in a hard line. Take the sides and back down with a guard #2, blending up into the longer top with a soft taper — no hard fade line, I want it to look grown-in and natural. Keep my beard at a light stubble length, tapering it into the sideburns so there’s no harsh line between hair and beard. Finish with a light texturizing on the fringe only, no gel shine.”
If daily fringe-styling still feels like more effort than you want to give your hair, the next style trims things down even further into a true wash-and-go buzz that needs almost no attention at all.
2 of 12 — The Sandstone Sweep

The Sandstone Sweep: Complete Style Guide
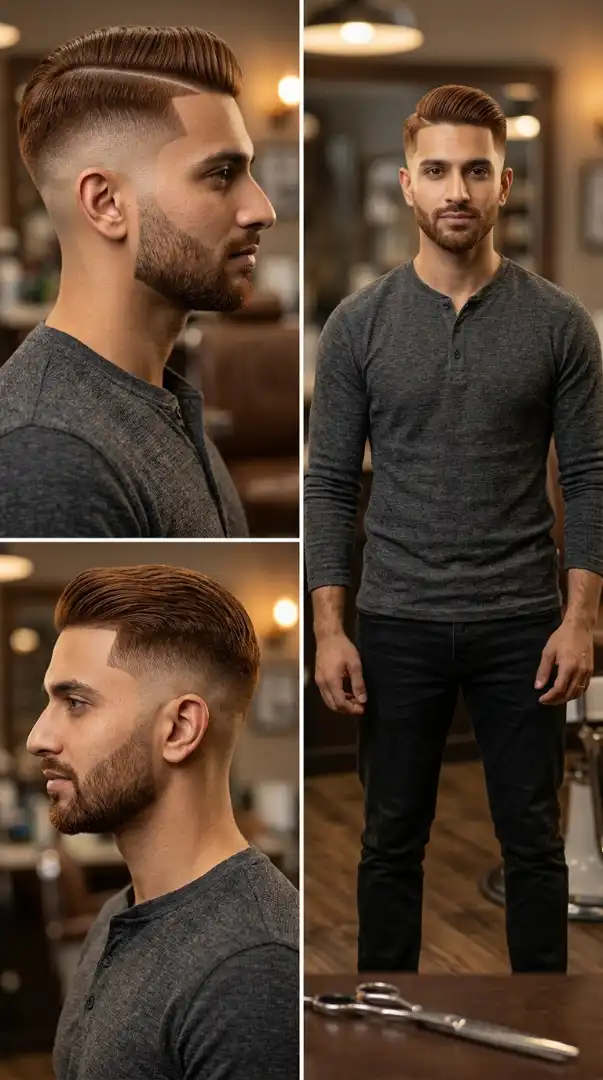
The Sandstone Sweep takes vanilla blonde balayage over a straight, dark base and sweeps it back off the face in a controlled, editorial motion. This cut leans into contrast — dark roots against warm blonde ends — which is why it photographs so distinctly against the barbershop setting it’s paired with here. Straight hair is essential to this style’s success because the sweep-back motion needs hair that lies flat and controlled rather than hair that resists direction with natural wave or curl. The Sandstone Sweep sits firmly in editorial territory, more structured than a casual crop, and works especially well for men who want their blonde to read as deliberate rather than sun-bleached.
Which Face Shapes Suit The Sandstone Sweep Best
Square and Diamond face shapes benefit most from The Sandstone Sweep because pulling the hair back off the forehead exposes and celebrates strong bone structure rather than hiding it. On a Square face, the swept-back style elongates the face slightly by adding height at the crown, balancing a strong jawline. On a Diamond face, the sweep draws attention to prominent cheekbones while the density at the crown balances a narrower forehead. Round faces should avoid this style or request significant height at the crown, since a flat sweep-back on a Round face removes the vertical elongation the face type needs and can emphasize width instead. Heart-shaped faces should proceed carefully — pulling all the hair back exposes a wider forehead, which can throw the face’s proportions off unless paired with texture near the temples to soften the transition.
Grooming Kit for The Sandstone Sweep
Clippers: Andis Master (Model 01557) for the temple fade and cleanup work. Trimmer/Outliner: Andis T-Outliner (Model 04710) for the sharp hairline and beard edge-up. Finishing Tools: Kent 81T fine-tooth comb for the deep side part, Denman D3 boar bristle brush for smoothing the sweep-back direction. Styling Product: Layrite Original Pomade (medium hold) — a pea-sized portion warmed between palms and worked through damp hair for a controlled, natural-looking hold without heavy shine. Maintenance: Viking Revolution Beard Oil, a few drops massaged into the full beard daily to keep the beard-to-hairline transition looking sharp and intentional.
How Often You Need To Maintain The Sandstone Sweep
Maintenance level: MEDIUM to HIGH. Barber visits for fade touch-ups should happen every 2-3 weeks to keep the temple fade crisp, since the contrast between short sides and swept-back length shows growth quickly. Daily styling time runs 6-8 minutes — the sweep-back direction needs to be rebuilt each morning with pomade and a comb, since straight hair alone won’t hold this shape overnight. The product routine involves two steps: pomade application followed by comb-through for direction. As it grows out, the fade softens first, usually by week 3, making the contrast look muddy rather than sharp. Monthly maintenance cost, including fade touch-ups and pomade, runs approximately $70-90. Difficulty rating for home upkeep between cuts: Intermediate, since getting the sweep-back direction right daily takes some practice.
What To Say To Your Barber For The Sandstone Sweep
Say this to your barber: “I want The Sandstone Sweep — a high skin fade starting right above the ear, blending from a guard #1 at the line up to a guard #4 near the parietal ridge. Leave the top at 3.5 to 4 inches so there’s enough length to sweep back and hold direction. Cut a deep side part on the left side. Keep the crown dense, don’t thin it out too much, I need weight there to hold the sweep. Taper my beard into the fade cleanly at the jawline, keeping the beard length around 8-10mm throughout. Finish with a sharp lineup at the temples and a clean edge-up around the hairline.”
If this level of daily upkeep feels like too much precision to chase every morning, the next style trades the structured sweep for a relaxed, wash-and-go texture that still keeps the same vanilla blonde payoff.
3 of 12 — The Frost Wave Collage
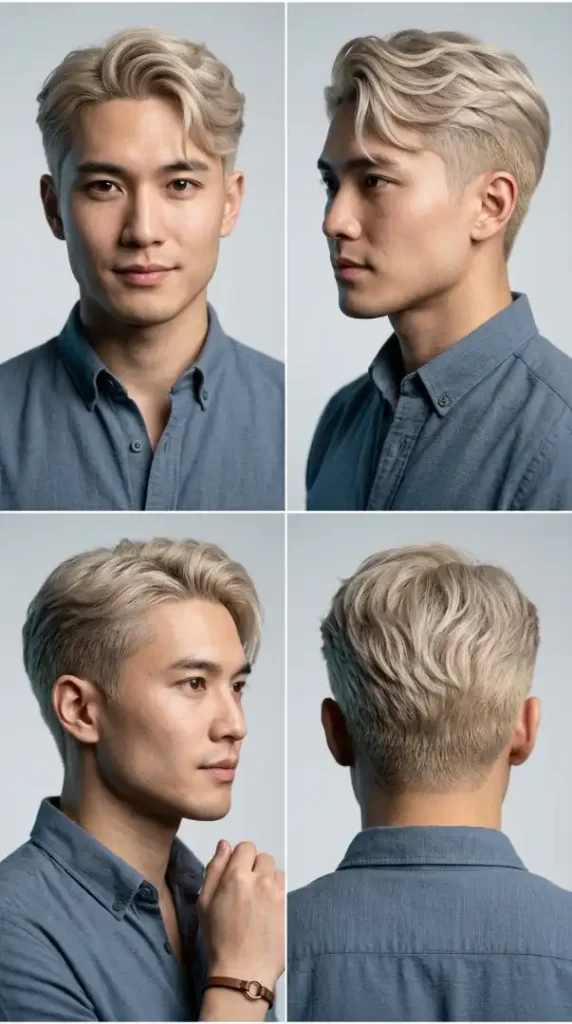
The Frost Wave Collage: Complete Style Guide
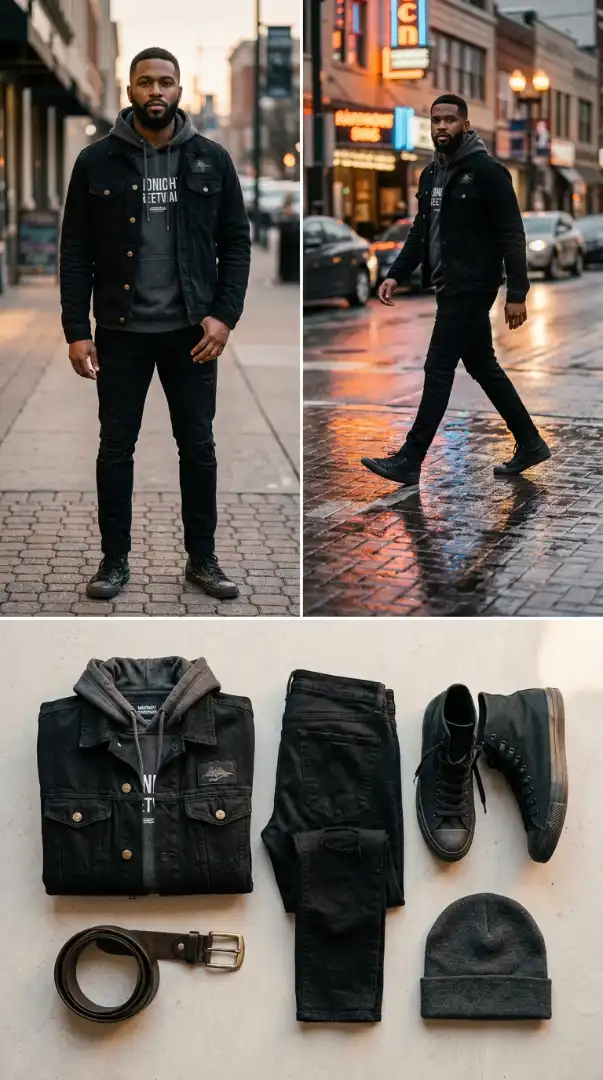
The Frost Wave Collage takes vanilla blonde straight hair with subtle ash undertones and shapes it into soft natural waves paired with a clean side fade. This cut leans on straight hair’s flatness to make the waves look deliberately textured rather than uncontrolled, since straight strands take styling product evenly without frizzing into unpredictable curl patterns. The fade underneath keeps the silhouette sharp from every angle, which is exactly why The Frost Wave Collage was built as a full four-angle showcase — it holds up from the front, both profiles, and the back without losing shape. This is a style built for guys who want texture on top without sacrificing a clean, structured base.
Which Face Shapes Suit The Frost Wave Collage Best
Round faces get real benefit from The Frost Wave Collage because the fade removes width from the sides while the textured waves add height at the crown, creating a vertical line that elongates the face. Oval and Diamond faces also carry this style comfortably since the wave texture adds dimension without disrupting already-balanced proportions. Square faces should approach with slightly more length left in the waves to soften the strong jawline rather than emphasizing it further with a tight fade. Oblong faces should avoid excessive crown height in the styling, since this cut already adds vertical length and an overly tall wave can make a long face look longer.
Grooming Kit for The Frost Wave Collage
Clippers: Andis Master (Model 01557) for the side and back fade work. Trimmer/Outliner: Andis T-Outliner (Model 04710) for the hairline and neckline edge-up. Finishing Tools: Denman D3 boar bristle brush for shaping the natural wave pattern, Kent 81T fine-tooth comb for the side part. Styling Product: Layrite Original Pomade (medium hold) — a dime-sized amount worked through damp hair to define waves without flattening texture, or a sea-salt texturizing spray for added grip. Maintenance: A light daily moisturizer to keep the clean-shaven skin smooth, plus a color-safe conditioner to protect the ash-vanilla blonde tone from brassiness.
How Often You Need To Maintain The Frost Wave Collage
Maintenance level: MEDIUM. Barber visits for the fade should happen every 2-3 weeks to keep the gradient sharp, while the wave length on top can stretch to 5-6 weeks before a trim. Daily styling time is 5-7 minutes — work pomade through damp hair, then use a boar bristle brush to shape the waves into place while maintaining natural movement. The product routine is a single step: pomade and brush-through. As it grows out, the waves loosen into a softer, shaggier texture by week 5, while the fade needs attention sooner, usually by week 3. Monthly maintenance cost, including fade touch-ups and pomade, runs approximately $65-85. Difficulty rating for home upkeep between cuts: Intermediate, since shaping natural-looking waves takes some practice with the brush technique.
What To Say To Your Barber For The Frost Wave Collage
Say this to your barber: “I want The Frost Wave Collage — a mid skin fade starting just above the ear, blending from a guard #1 at the line up to a guard #3 at the parietal ridge. Keep the top at 3 to 3.5 inches with light texturizing throughout to bring out natural wave movement, no blunt cutting. Cut a clean side part and keep the crown dense enough to hold volume. Since I’m clean-shaven, give me a crisp, sharp lineup around the hairline with clean edge work at the neckline and temples.”
If a full four-angle showcase style feels like more than you need day-to-day, the next style pulls things back to a single, ultra-simple look that’s just as photogenic with a fraction of the effort.
4 of 12 — The Honeycomb Buzz
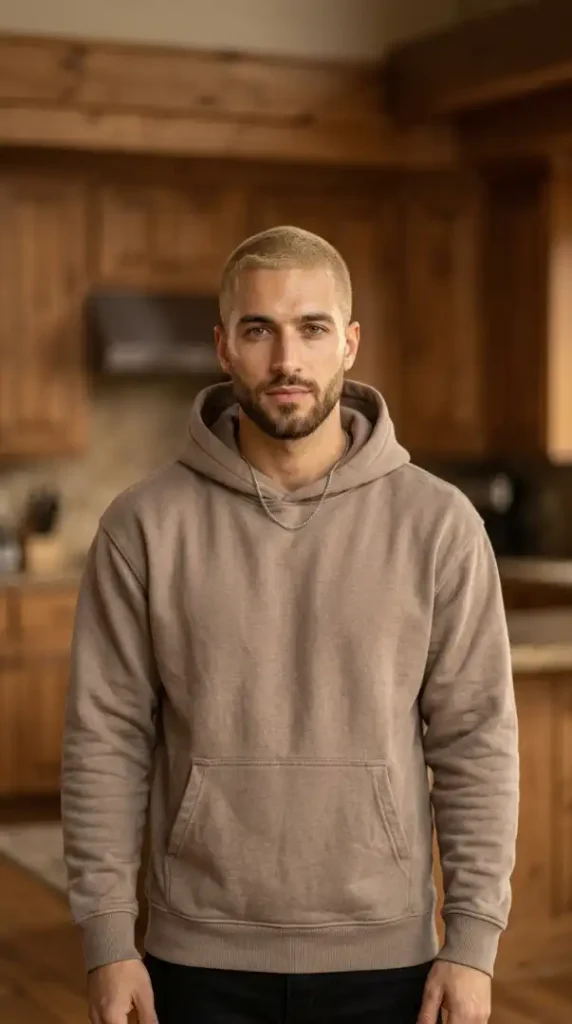
The Honeycomb Buzz: Complete Style Guide
The Honeycomb Buzz strips vanilla blonde hair down to its simplest, most wash-and-go form — a uniform buzz cut with warm honey undertones that catches light beautifully without any styling effort at all. This cut works because straight hair buzzes evenly with no cowlicks or wave patterns disrupting the uniform length, giving a clean, textbook buzz silhouette. The honey-toned vanilla blonde reads warm against Middle Eastern and olive skin tones, avoiding the washed-out look that a cooler platinum blonde might create on deeper complexions. The Honeycomb Buzz is the lowest-maintenance style in this entire roundup, making it the go-to answer for anyone asking how to get a great haircut without any morning routine at all.
Which Face Shapes Suit The Honeycomb Buzz Best
Diamond and Oval face shapes suit The Honeycomb Buzz best because the uniform buzz keeps focus entirely on facial structure without adding bulk anywhere, letting strong cheekbones and balanced proportions do the visual work. Square faces also wear this style well, with the buzz emphasizing a strong jawline rather than competing with it. Round faces should be cautious with a fully uniform buzz, since removing all volume can make a round face look wider with nothing to add vertical balance — requesting slightly longer length on top (guard #3 instead of #2) helps counter this. Heart-shaped faces do well with this cut as long as the beard is kept full enough to balance a narrower chin against a wider forehead.
Grooming Kit for The Honeycomb Buzz
Clippers: Wahl Magic Clip (Model 5049-400) with a guard #2 attachment for the all-over buzz length. Trimmer/Outliner: Andis T-Outliner (Model 04710) for the hairline edge-up and beard lineup. Finishing Tools: A soft-bristle brush for daily light styling, though minimal tools are needed for this cut. Styling Product: Optional light matte cream, a pea-sized amount, only if you want slight texture definition at the top — most days this cut needs no product at all. Maintenance: Viking Revolution Beard Oil, a few drops daily to keep the short full beard soft and well-conditioned.
How Often You Need To Maintain The Honeycomb Buzz
Maintenance level: LOW. Barber visits should happen every 3-4 weeks since a buzz cut grows out evenly and doesn’t lose its shape as dramatically as a fade would. Daily styling time is 0-2 minutes — this is essentially a wash-and-go cut with no required product application. There is no real product routine unless you choose to add light texture cream on days you want more definition. As it grows out, the buzz simply gets slightly longer and softer without losing its basic shape, staying wearable well past the 4-week mark. Monthly maintenance cost, including cuts only, runs approximately $30-40, making it the most budget-friendly option in this list. Difficulty rating for home upkeep: Beginner — many guys maintain this cut entirely themselves with a home clipper set between barber visits.
What To Say To Your Barber For The Honeycomb Buzz
Say this to your barber: “I want The Honeycomb Buzz — an all-over buzz using a guard #2 for uniform length across the entire head, no fade needed. Keep the length completely even from crown to sides, no blending required. Taper my beard into a clean short full shape, keeping length around 6-8mm throughout, tapered slightly shorter at the neckline. Finish with a sharp edge-up around the hairline and beard for a crisp, intentional look.”
If wash-and-go simplicity isn’t quite enough visual interest for you, the next style adds back a bit of structure with a side-parted, product-styled look that still keeps daily effort low.
5 of 12 — The Ivory Side Part
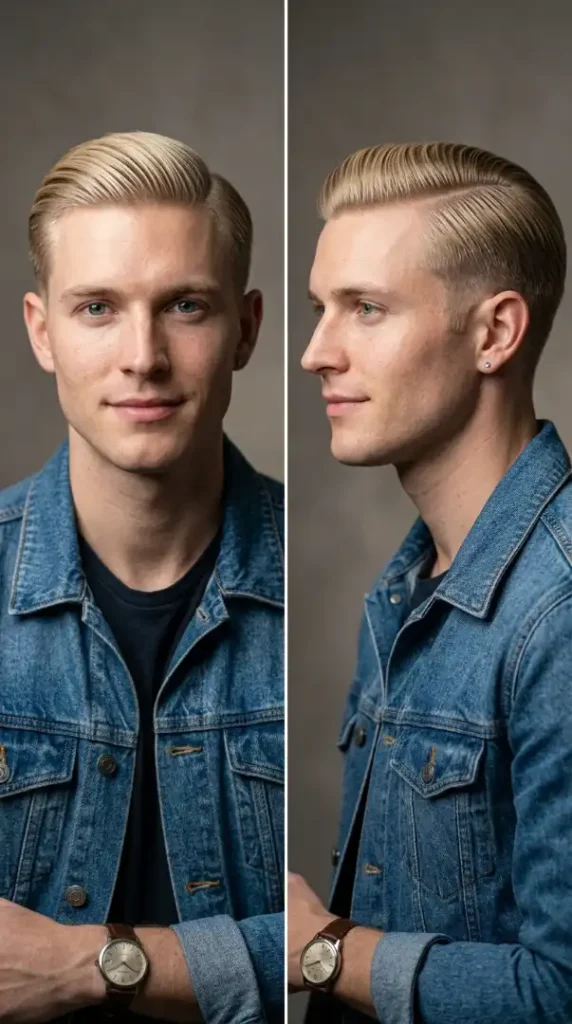
The Ivory Side Part: Complete Style Guide
The Ivory Side Part brings vanilla blonde straight hair into classic, polished territory with a defined part line and a smooth, controlled finish. This cut relies on straight hair’s natural tendency to lie flat, letting the side part read as crisp and deliberate rather than fighting against natural texture. The cool undertone in this particular vanilla blonde shade pairs especially well with fair, cooler-toned skin, avoiding any orange or brassy cast that a warmer blonde might create. The Ivory Side Part is the most traditionally “groomed” look in this collection, appealing directly to anyone searching for a timeless style that still photographs as modern.
Which Face Shapes Suit The Ivory Side Part Best
Oblong and Oval face shapes suit The Ivory Side Part best because the horizontal side part adds visual width at the crown without adding extra height, helping balance a longer face shape. Square faces also do well here, with the smooth, controlled finish softening the jaw’s angularity through the styled length. Round faces should avoid a deep, heavy side part with excessive volume, since added width at the top of a round face can make the whole face look wider — a shallower, less voluminous side part works better. Heart-shaped faces can wear this style but should ask for a slightly deeper part to draw a diagonal line that balances a wider forehead against a narrower chin.
Grooming Kit for The Ivory Side Part
Clippers: Wahl Magic Clip (Model 5049-400) for the taper at the sides and back. Trimmer/Outliner: Andis T-Outliner (Model 04710) for the crisp hairline and side part definition. Finishing Tools: Kent 81T fine-tooth comb for creating and maintaining the sharp part line, Denman D3 boar bristle brush for smoothing the finish. Styling Product: Layrite Original Pomade (medium hold) — a dime-sized amount worked through damp hair and combed through for a classic, controlled shine. Maintenance: A light daily moisturizer to keep the clean-shaven skin smooth and free of irritation.
How Often You Need To Maintain The Ivory Side Part
Maintenance level: MEDIUM. Barber visits should happen every 3-4 weeks to maintain the taper and keep the part line crisp. Daily styling time is 5-6 minutes — comb pomade through damp hair, define the part with a fine-tooth comb, then smooth with a boar bristle brush. The product routine is a single step: pomade and comb. As it grows out, the part becomes harder to maintain sharply around week 4, and the taper starts to lose definition by week 3. Monthly maintenance cost, including cuts and pomade, runs approximately $55-75. Difficulty rating for home upkeep between cuts: Beginner to Intermediate.
What To Say To Your Barber For The Ivory Side Part
Say this to your barber: “I want The Ivory Side Part — a low taper fade starting just above the ear, blending from a guard #2 at the line up to a guard #4 near the crown. Keep the top at 3 inches with a defined, deep side part cut into the hairline. Keep the length blunt cut for weight so it holds the part cleanly. Since I’m clean-shaven, give me a crisp, sharp lineup at the temples and hairline for a polished finish.”
If a classic, controlled part feels too formal for your everyday routine, the next style loosens things up with a more relaxed, textured finish that still keeps the same vanilla blonde tone front and center.
6 of 12 — The Dune Textured Fringe

The Dune Textured Fringe: Complete Style Guide
The Dune Textured Fringe takes vanilla blonde straight hair with golden, sun-kissed undertones and builds it into a heavily textured fringe that looks effortlessly wind-swept. This cut works because straight hair takes a heavy texturizing cut cleanly, with each layer falling into place rather than clumping the way curlier hair might. The golden undertone in this shade was chosen specifically to complement lighter tan and Australian-feature skin tones, keeping the blonde looking sun-warmed rather than artificial. The Dune Textured Fringe reads casual and outdoorsy, making it a favorite for guys who want their hair to look like it’s naturally been kissed by the sun rather than obviously salon-styled.
Which Face Shapes Suit The Dune Textured Fringe Best
Heart and Oval face shapes suit The Dune Textured Fringe best because the heavy fringe adds width and texture at the forehead, balancing a Heart face’s narrower jaw against a wider brow. Diamond faces also benefit, since the textured fringe softens prominent cheekbones with movement. Round faces should avoid this cut or ask for a slightly shorter, less horizontal fringe, since heavy texture at the forehead can add unwanted width to an already round face. Long or Oblong faces should request extra length retained in the fringe to break up vertical proportions rather than a shorter, cropped version.
Grooming Kit for The Dune Textured Fringe
Clippers: Andis Master (Model 01557) for the fade at the sides and back. Trimmer/Outliner: Andis T-Outliner (Model 04710) for the hairline and stubble edge work. Finishing Tools: Denman D3 boar bristle brush for separating and defining fringe texture, fingers for natural piece definition rather than a comb. Styling Product: A matte texturizing paste or sea-salt spray, a dime-sized amount scrunched through damp hair to enhance natural piece separation and hold. Maintenance: Honest Amish Beard Oil, a few drops worked into the stubble daily to keep the beard-to-fade transition looking clean and intentional.
How Often You Need To Maintain The Dune Textured Fringe
Maintenance level: MEDIUM. Barber visits for the fade should happen every 3 weeks, while the fringe length can stretch to 6 weeks since a slightly grown-out texture actually enhances this style’s casual look. Daily styling time is 4-5 minutes — scrunch texturizing paste through damp hair with fingers, then let it air-dry into place for natural movement. The product routine is a single step: paste application with fingers, no brush required. As it grows out, the fringe simply gets longer and more textured, staying wearable well past 6 weeks, while the fade softens by week 3-4. Monthly maintenance cost, including fade touch-ups and texturizing product, runs approximately $55-70. Difficulty rating for home upkeep between cuts: Beginner, since this style is forgiving of imperfect daily styling.
What To Say To Your Barber For The Dune Textured Fringe
Say this to your barber: “I want The Dune Textured Fringe — a mid skin fade starting at the temple, blending from a guard #2 at the line up to a guard #4 at the parietal ridge. Keep the top at 3.5 inches with heavy texturizing throughout using thinning shears, especially through the fringe, so it has natural piece separation. Point cut the ends rather than blunt cutting. Taper my stubble into the fade cleanly at the sideburns, keeping length around 3-4mm. Finish with a soft, natural lineup — nothing too sharp, I want this to look effortless.”
If this sun-warmed, textured look feels too casual for certain occasions, the next style brings back a slightly more structured silhouette while keeping the same low-effort daily styling.
7 of 12 — The Platinum Crown Fade

The Platinum Crown Fade: Complete Style Guide
The Platinum Crown Fade pairs straightened, platinum-cool vanilla blonde strands with a razor-sharp fade for maximum visual contrast against deeper skin tones. This cut requires straight, flat-lying hair for the polish to read cleanly, since the styled finish depends on strands sitting close and even rather than lifting with natural volume. The cooler platinum undertone in this shade was selected specifically to create striking contrast against deep, warm skin, which is exactly why this style photographs so distinctly and performs well on Pinterest boards focused on bold transformations. The Platinum Crown Fade is a statement cut — subtlety isn’t the goal here, visual impact is.
Which Face Shapes Suit The Platinum Crown Fade Best
Square and Oval face shapes benefit most from The Platinum Crown Fade because the flat, controlled top adds structure without adding unwanted width, while the sharp fade underneath emphasizes strong jaw definition. Diamond faces also do well, with the fade drawing a clean vertical line that complements angular cheekbones. Round faces should avoid a very flat, low-volume top, since it removes the vertical elongation a round face benefits from — asking for slightly more height at the crown helps correct this. Oblong faces should request a touch more length left at the front to avoid over-elongating an already long face shape.
Grooming Kit for The Platinum Crown Fade
Clippers: Wahl Magic Clip (Model 5049-400) for the sharp fade work. Trimmer/Outliner: Andis T-Outliner (Model 04710) for the crisp lineup and beard edge-up. Finishing Tools: Kent 81T fine-tooth comb for the side part and flat styling, Denman D3 boar bristle brush for smoothing the top. Styling Product: American Crew Fiber (matte finish, high hold) — a dime-sized amount worked through completely dry hair for a flat, controlled finish without excess shine. Maintenance: Viking Revolution Beard Oil, a few drops daily to keep the short full beard conditioned and the beard-to-fade line looking sharp.
How Often You Need To Maintain The Platinum Crown Fade
Maintenance level: HIGH. Barber visits should happen every 2 weeks to keep the sharp fade looking crisp, since any regrowth is immediately visible against the contrast this style is built around. Daily styling time is 6-8 minutes — work fiber through completely dry hair, then use a fine-tooth comb to press the top flat and controlled. The product routine is a single step: fiber and comb-through. As it grows out, the fade softens noticeably by day 10-12, losing the sharp contrast that defines this look. Monthly maintenance cost, including frequent fade touch-ups and styling product, runs approximately $85-110, plus periodic root touch-ups for the blonde color itself. Difficulty rating for home upkeep between cuts: Intermediate to Advanced, since maintaining flat styling on straightened hair daily takes consistent technique.
What To Say To Your Barber For The Platinum Crown Fade
Say this to your barber: “I want The Platinum Crown Fade — a high skin fade starting right above the ear, blending from a guard #1 at the line up to a guard #3 at the parietal ridge. Keep the top at 2.5 to 3 inches, cut blunt for weight so it can be styled flat and controlled. Cut a subtle side part into the front. Taper my beard into the fade cleanly at the jawline, keeping length around 6mm. Finish with a razor-sharp lineup at the temples and hairline — this is a bold, high-contrast look so precision matters here.”
If this level of bold contrast and frequent upkeep feels like more than you want to commit to, the next style brings back a softer, lower-maintenance approach while keeping the same vanilla blonde payoff.
8 of 12 — The Champagne Quiff
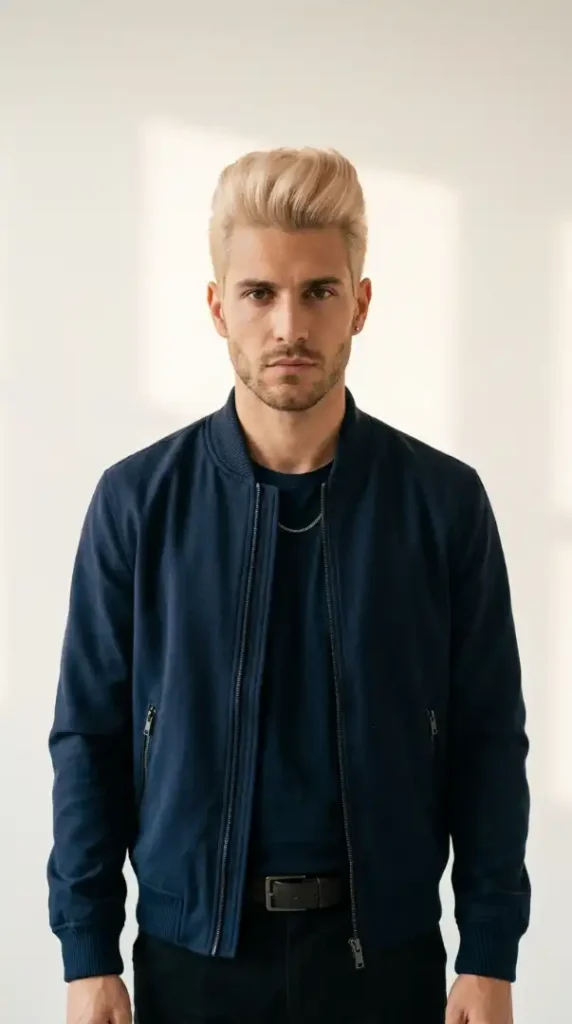
The Champagne Quiff: Complete Style Guide
The Champagne Quiff takes vanilla blonde straight hair with a soft champagne undertone and builds height and volume at the front for a structured, elevated silhouette. This cut depends on straight hair’s ability to hold a lifted shape cleanly with the right product, since straight strands respond predictably to root-lifting techniques in a way that wavy or curly hair often resists. The soft champagne tone reads warm and luminous, making it especially flattering on olive and Mediterranean skin tones where it avoids any washed-out or overly pale effect. The Champagne Quiff is a confident, structured style built for guys who want their hair to add visible presence rather than blend quietly into the background.
Which Face Shapes Suit The Champagne Quiff Best
Oval and Round face shapes benefit significantly from The Champagne Quiff because the added height at the crown elongates the face, drawing the eye upward and creating vertical balance that a Round face especially needs. Diamond faces also do well, as the height at the front balances a narrower forehead against wider cheekbones. Square faces can wear this style but should keep the sides slightly less tight to avoid over-emphasizing an already strong jawline in combination with the height on top. Long or Oblong faces should be cautious with excessive quiff height, since additional vertical volume can make an already long face look longer — a shorter, more moderate lift works better here.
Grooming Kit for The Champagne Quiff
Clippers: Andis Master (Model 01557) for the taper at the sides. Trimmer/Outliner: Andis T-Outliner (Model 04710) for the hairline and stubble edge-up. Finishing Tools: A round paddle brush and a blow dryer for root-lifting the front section, Kent 81T fine-tooth comb for shaping the quiff’s edges. Styling Product: A strong-hold volumizing mousse applied to damp roots, followed by Layrite Original Pomade (medium hold) — a dime-sized amount to set and define the finished shape. Maintenance: Honest Amish Beard Oil, a few drops worked into the stubble daily to keep the beard-to-hairline transition looking sharp.
How Often You Need To Maintain The Champagne Quiff
Maintenance level: MEDIUM to HIGH. Barber visits should happen every 3-4 weeks to keep the length and taper in proportion for the quiff shape. Daily styling time is 7-9 minutes — this is the most involved daily routine in the collection, requiring mousse application, blow-drying for lift, and pomade to set the shape. The product routine involves two steps: volumizing mousse followed by pomade. As it grows out, the quiff loses its lifted structure around week 4 as the hair becomes too heavy to hold height without extra product. Monthly maintenance cost, including cuts, mousse, and pomade, runs approximately $75-95. Difficulty rating for home upkeep between cuts: Intermediate to Advanced, since building consistent height each morning takes practiced blow-drying technique.
What To Say To Your Barber For The Champagne Quiff
Say this to your barber: “I want The Champagne Quiff — a low taper fade starting above the ear, blending from a guard #2 at the line up to a guard #4 near the crown. Keep the top at 4 inches with weight left at the front specifically for lift, texturize slightly underneath to reduce bulk without losing volume. Cut the front section so it can be blow-dried upward into a structured quiff. Taper my stubble into the fade cleanly at the sideburns. Finish with a sharp lineup at the temples and hairline.”
If a structured, high-volume look like this feels like too much daily commitment, the next style strips things down to a wash-and-go routine that still turns heads without any blow-drying required.
9 of 12 — The Linen Textured Crop
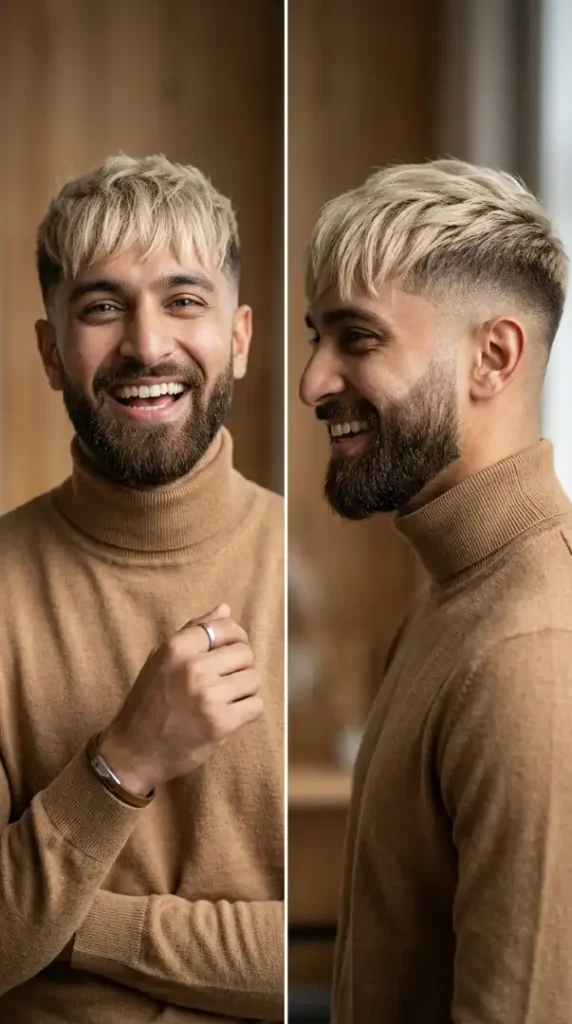
The Linen Textured Crop: Complete Style Guide
The Linen Textured Crop combines a soft neutral vanilla blonde with a light forward fringe and a matte, textured finish for an understated, everyday-wearable look. This cut relies on straight hair’s even growth pattern to keep the light fringe falling consistently across the forehead without the unevenness curl patterns can introduce. The neutral undertone in this shade is deliberately versatile, avoiding strong warm or cool casts so it works across a wide range of skin tones, including warm beige complexions like South Asian skin. The Linen Textured Crop is designed to feel like the easiest possible entry point into vanilla blonde hair — subtle enough for first-timers, textured enough to still look intentional.
Which Face Shapes Suit The Linen Textured Crop Best
Round and Oval face shapes both suit The Linen Textured Crop well, with the light fringe adding just enough visual interest at the forehead to create balance without overwhelming either face type. Square faces do well too, since the soft texture slightly rounds off the visual hardness of a strong jawline. Oblong faces should ask for a slightly heavier fringe than the default to interrupt vertical length more effectively. Diamond faces should keep the fringe on the shorter side to avoid adding unnecessary width at the temples, which can compete with already-prominent cheekbones.
Grooming Kit for The Linen Textured Crop
Clippers: Wahl Magic Clip (Model 5049-400) for the fade and cleanup work. Trimmer/Outliner: Andis T-Outliner (Model 04710) for the sharp hairline and beard edge-up. Finishing Tools: Kent 81T fine-tooth comb for light parting, Denman D3 boar bristle brush for texture definition. Styling Product: American Crew Fiber (matte finish, high hold) — a pea-sized portion worked through damp hair for natural texture without shine. Maintenance: Viking Revolution Beard Oil, a few drops daily to keep the full beard soft and the beard-to-fade transition looking clean.
How Often You Need To Maintain The Linen Textured Crop
Maintenance level: LOW to MEDIUM. Barber visits should happen every 4 weeks, since this crop is more forgiving of growth than sharper, high-contrast styles. Daily styling time is 3-4 minutes — work fiber through damp hair with fingers, then lightly brush the fringe into place. The product routine is a single step: fiber and finger-styling. As it grows out, the crop simply softens into a slightly shaggier texture, staying wearable well past 4 weeks without looking unkempt. Monthly maintenance cost, including cuts and styling fiber, runs approximately $45-60. Difficulty rating for home upkeep between cuts: Beginner.
What To Say To Your Barber For The Linen Textured Crop
Say this to your barber: “I want The Linen Textured Crop — a mid skin fade starting at the temple, blending from a guard #1 up to a guard #3 at the parietal ridge. Keep the top at 2.5 to 3 inches with light texturizing throughout using thinning shears, especially at the fringe so it falls forward naturally. Taper my beard into the fade cleanly at the jawline, keeping length around 8mm. Finish with a soft lineup at the temples and hairline — nothing overly sharp, I want this to look low-key and easy.”
If this understated, everyday look feels a little too subtle, the next style dials the styling back up with a more editorial, high-volume finish that still keeps the same vanilla blonde base.
10 of 12 — The Marble Slick Back

The Marble Slick Back: Complete Style Guide
The Marble Slick Back takes cool, marble-white-toned vanilla blonde and slicks it straight back into a high-shine, controlled finish. Straight hair is essential here, since the slicked-back effect depends on strands lying completely flat without the lift or frizz that wavy or curly textures would introduce, especially under high-shine product. This particular vanilla blonde undertone leans cooler and almost white, chosen deliberately to create a striking, marble-like visual against warm tan skin. The Marble Slick Back is a vintage-leaning, editorial style that photographs beautifully in barbershop settings, which is exactly why it’s paired with a classic leather chair backdrop here.
Which Face Shapes Suit The Marble Slick Back Best
Diamond and Square face shapes suit The Marble Slick Back best, since pulling all the hair back exposes strong bone structure and angular jawlines rather than hiding them behind volume. Oval faces also wear this style comfortably without needing correction. Round faces should avoid a completely flat slick-back, since removing all volume at the crown eliminates the vertical elongation a round face needs — requesting slightly more height before slicking back helps balance this. Heart-shaped faces should be cautious, since fully exposing the forehead can emphasize a wider brow against a narrower chin; keeping a bit of length near the temples helps soften this transition.
Grooming Kit for The Marble Slick Back
Clippers: Andis Master (Model 01557) for the tight taper at the sides and back. Trimmer/Outliner: Andis T-Outliner (Model 04710) for the sharp hairline and edge work. Finishing Tools: Kent 81T fine-tooth comb for slicking the length back and creating the controlled shine, a blow dryer on low heat for pre-styling setup. Styling Product: A high-shine, strong-hold pomade — a dime-sized amount melted between palms and combed through completely for a glass-like finish. Maintenance: A light daily moisturizer to keep the clean-shaven skin smooth and free from irritation caused by daily product application near the hairline.
How Often You Need To Maintain The Marble Slick Back
Maintenance level: MEDIUM to HIGH. Barber visits should happen every 3 weeks to maintain the taper that supports the slicked-back shape. Daily styling time is 6-7 minutes — comb strong-hold pomade through completely dry hair, working from front to back for a controlled, glossy finish. The product routine is a single step: pomade application and comb-through. As it grows out, the taper softens around week 3, making the slick-back look less crisp and more like an ungroomed grow-out. Monthly maintenance cost, including cuts and high-shine pomade, runs approximately $65-85. Difficulty rating for home upkeep between cuts: Intermediate, since achieving a perfectly even slick-back finish takes some practice.
What To Say To Your Barber For The Marble Slick Back
Say this to your barber: “I want The Marble Slick Back — a tight taper starting at the nape, blending from a guard #1 up to a guard #3 near the crown. Keep the top at 3.5 to 4 inches, cut blunt for weight so it holds a slicked-back shape with strong-hold pomade. No fringe or forward-falling pieces — I want everything to comb straight back cleanly. Since I’m clean-shaven, give me a sharp, precise lineup around the hairline and temples for a polished, vintage-inspired finish.”
If this level of daily precision and shine isn’t your everyday style, the next style trades the glossy slick-back for a matte, relaxed finish that still keeps the same cool-toned vanilla blonde.
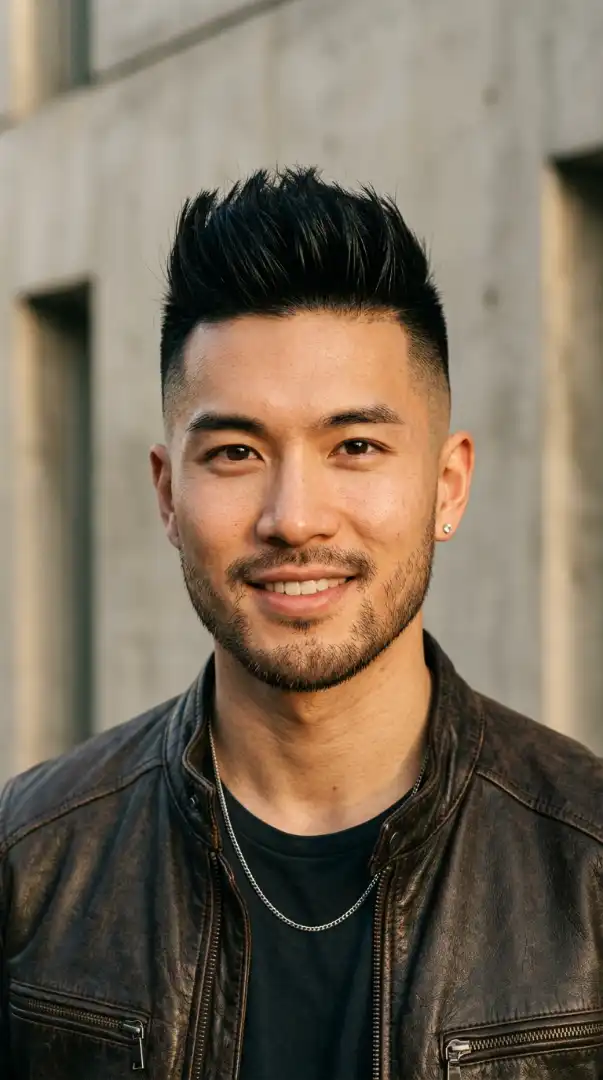
11 of 12 — The Oatmilk Textured Fade
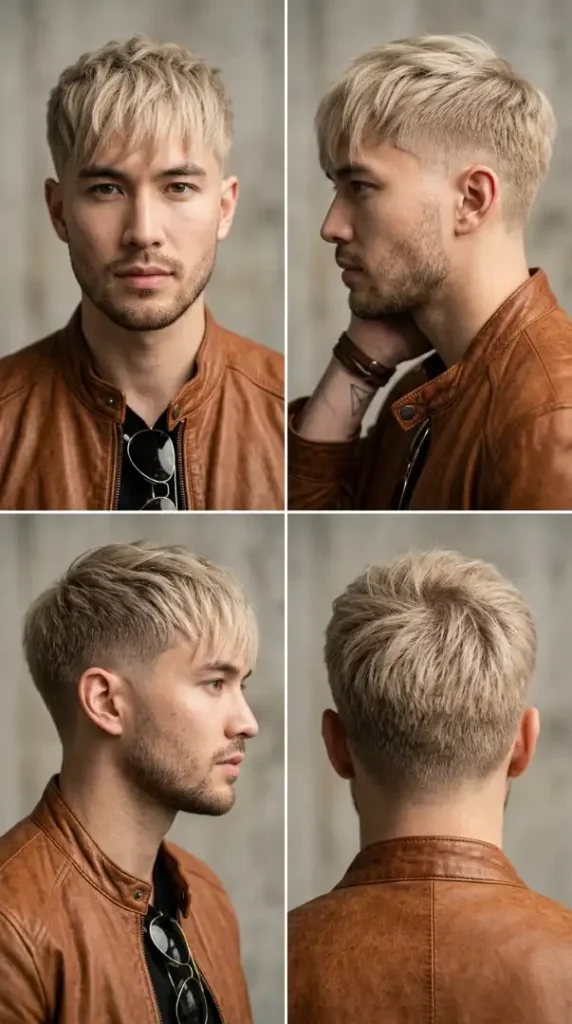
The Oatmilk Textured Fade: Complete Style Guide
The Oatmilk Textured Fade pairs a soft, oat-toned vanilla blonde with a heavily textured top and a clean fade, giving it a relaxed, urban edge. Straight hair takes this heavy texturizing cut evenly, allowing each piece to separate cleanly rather than clumping the way curlier textures might under similar cutting techniques. The oat undertone in this shade sits between warm and neutral, making it one of the most versatile vanilla blonde options for fair East Asian and similar skin tones that can look washed out under starker platinum shades. The Oatmilk Textured Fade brings together urban edge and low-key wearability, which is why it’s shown here against a simple concrete backdrop rather than a polished studio setting.
Which Face Shapes Suit The Oatmilk Textured Fade Best
Oblong and Oval face shapes suit The Oatmilk Textured Fade well, with the heavy texture on top adding width and visual interest without adding unwanted height to an already longer face. Square faces also do well, since the soft texture takes some hardness off a strong jawline. Round faces should ask for slightly more height at the crown to counteract the width the heavy texture adds, since a completely flat texture on a round face can emphasize width rather than balance it. Diamond faces should keep the fringe area shorter to avoid competing visually with prominent cheekbones.
Grooming Kit for The Oatmilk Textured Fade
Clippers: Wahl Magic Clip (Model 5049-400) for the fade work at the sides and back. Trimmer/Outliner: Andis T-Outliner (Model 04710) for the hairline and stubble edge-up. Finishing Tools: Denman D3 boar bristle brush for texture separation, fingers for natural piece definition. Styling Product: A matte texturizing clay, a dime-sized amount worked through damp hair for natural, undefined movement without shine. Maintenance: Honest Amish Beard Oil, a few drops worked into the stubble daily to keep the beard-to-fade transition looking intentional.
How Often You Need To Maintain The Oatmilk Textured Fade
Maintenance level: MEDIUM. Barber visits for the fade should happen every 2-3 weeks, while the textured top can stretch to 5 weeks before needing a trim. Daily styling time is 4-5 minutes — work texturizing clay through damp hair with fingers, then let it air-dry for natural piece separation. The product routine is a single step: clay application with fingers. As it grows out, the texture softens into a slightly shaggier look by week 5, while the fade needs attention sooner, around week 3. Monthly maintenance cost, including fade touch-ups and texturizing clay, runs approximately $60-80. Difficulty rating for home upkeep between cuts: Beginner to Intermediate.
What To Say To Your Barber For The Oatmilk Textured Fade
Say this to your barber: “I want The Oatmilk Textured Fade — a mid skin fade starting at the temple line, blending from a guard #1 up to a guard #3 at the parietal ridge. Keep the top at 3 inches with heavy texturizing throughout using thinning shears, point cut the ends so nothing sits blunt. Taper my stubble into the fade cleanly at the sideburns, keeping length around 4mm. Finish with a soft, natural lineup — I want this to look relaxed, not overly sharp.”
This wraps up an urban, low-key look that pairs well with the next and final style, which brings the collection full circle with a soft, romantic finish built for versatility across every setting.
12 of 12 — The Vanilla Silk Fringe
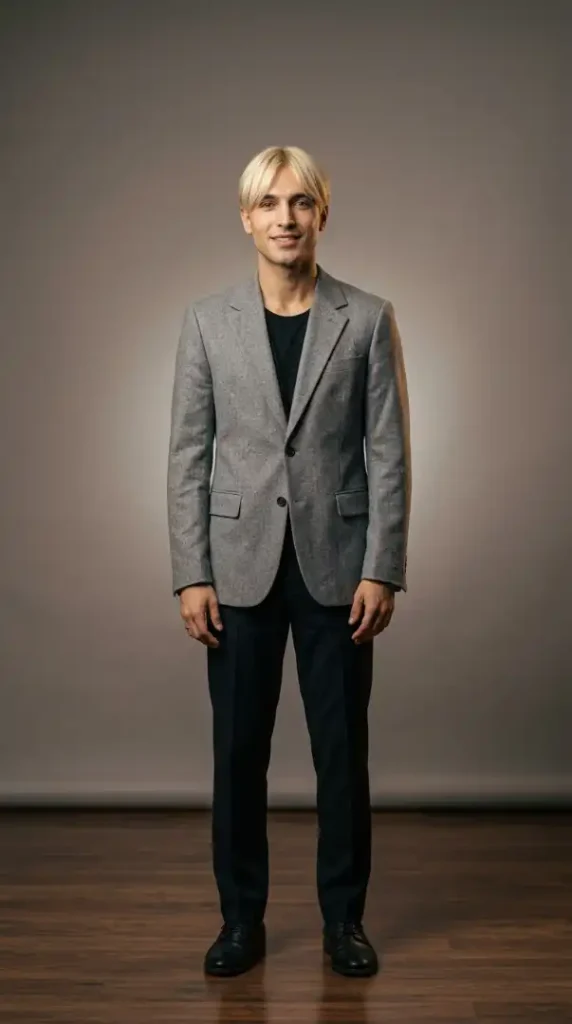
The Vanilla Silk Fringe: Complete Style Guide
The Vanilla Silk Fringe closes out this collection with the softest, most refined take on vanilla blonde straight hair — a silky curtain fringe with a natural sheen that photographs as effortlessly polished. Straight hair is what makes this fringe’s smooth, glossy fall possible, since any wave or curl pattern would break up the light-catching sheen this style depends on. The soft vanilla tone here reads warm without leaning gold, giving it broad appeal across warm beige and Middle Eastern skin tones without any risk of looking brassy. The Vanilla Silk Fringe rounds out the collection as the most universally flattering option, making it a strong final recommendation for anyone still deciding which vanilla blonde style to try first.
Which Face Shapes Suit The Vanilla Silk Fringe Best
Heart and Oval face shapes suit The Vanilla Silk Fringe best, with the soft curtain fringe adding gentle width at the temples to balance a Heart face’s narrower jawline. Square faces also wear this style comfortably, since the soft fringe takes some edge off strong jaw angles. Round faces should approach carefully, as the horizontal fringe line can add width across the upper face — requesting a slightly side-swept version rather than a fully centered part helps avoid this. Long or Oblong faces benefit from this style, since the fringe interrupts vertical length and adds visual weight to the upper third of the face.
Grooming Kit for The Vanilla Silk Fringe
Clippers: Wahl Magic Clip (Model 5049-400) for cleanup at the sides and neckline. Trimmer/Outliner: Andis T-Outliner (Model 04710) for sharp edge work along the hairline. Finishing Tools: Kent 81T fine-tooth comb for parting the fringe at the center, Denman D3 boar bristle brush for smoothing the silky finish. Styling Product: A lightweight, shine-enhancing serum, a few drops worked through damp hair to boost the natural sheen without weighing hair down. Maintenance: A light daily moisturizer to keep the clean-shaven skin smooth and complement the polished overall look.
How Often You Need To Maintain The Vanilla Silk Fringe
Maintenance level: LOW to MEDIUM. Barber visits should happen every 5-6 weeks, since this style relies more on length and shine than a sharp fade that grows out quickly. Daily styling time is 4-5 minutes — work a few drops of shine serum through damp hair, then use the boar bristle brush to smooth the fringe into its natural fall. The product routine is a single step: serum and brush-through. As it grows out, the fringe simply gets longer and continues to fall naturally, staying wearable well past 6 weeks with minimal restyling needed. Monthly maintenance cost, including cuts and shine serum, runs approximately $50-65. Difficulty rating for home upkeep between cuts: Beginner.
What To Say To Your Barber For The Vanilla Silk Fringe
Say this to your barber: “I want The Vanilla Silk Fringe — no fade needed, just a soft taper at the sides and back using a guard #3 for a gentle blend. Keep the top at 3.5 inches with a soft, center-parted fringe, point cut the ends so they fall naturally with movement. Keep the crown lightly textured but not thinned out too much, since I want enough weight for a smooth, silky fall. Since I’m clean-shaven, give me a soft, natural lineup around the hairline without an overly sharp edge.”
This completes the full vanilla blonde lineup for straight hair — from the lowest-maintenance buzz to the boldest platinum fade, there’s a version here for every face shape and every level of daily effort.